


Hammer Throw Technique
Hammer Throw
The hammer throw is divided into three main phases, each with challenging technical components. The main elements of the event include the start/winding action, the turns, and the release.
Circle Degrees
When teaching the hammer, the 360 degrees of the circle are used as reference points. 0/360 degrees in the back of the circle, going counter-clockwise, the front of the circle is 180.
Start and Winding
The thrower sets up in the back of the circle with the feet shoulder width apart, facing the opposite direction of the throw with the bodyweight balanced.
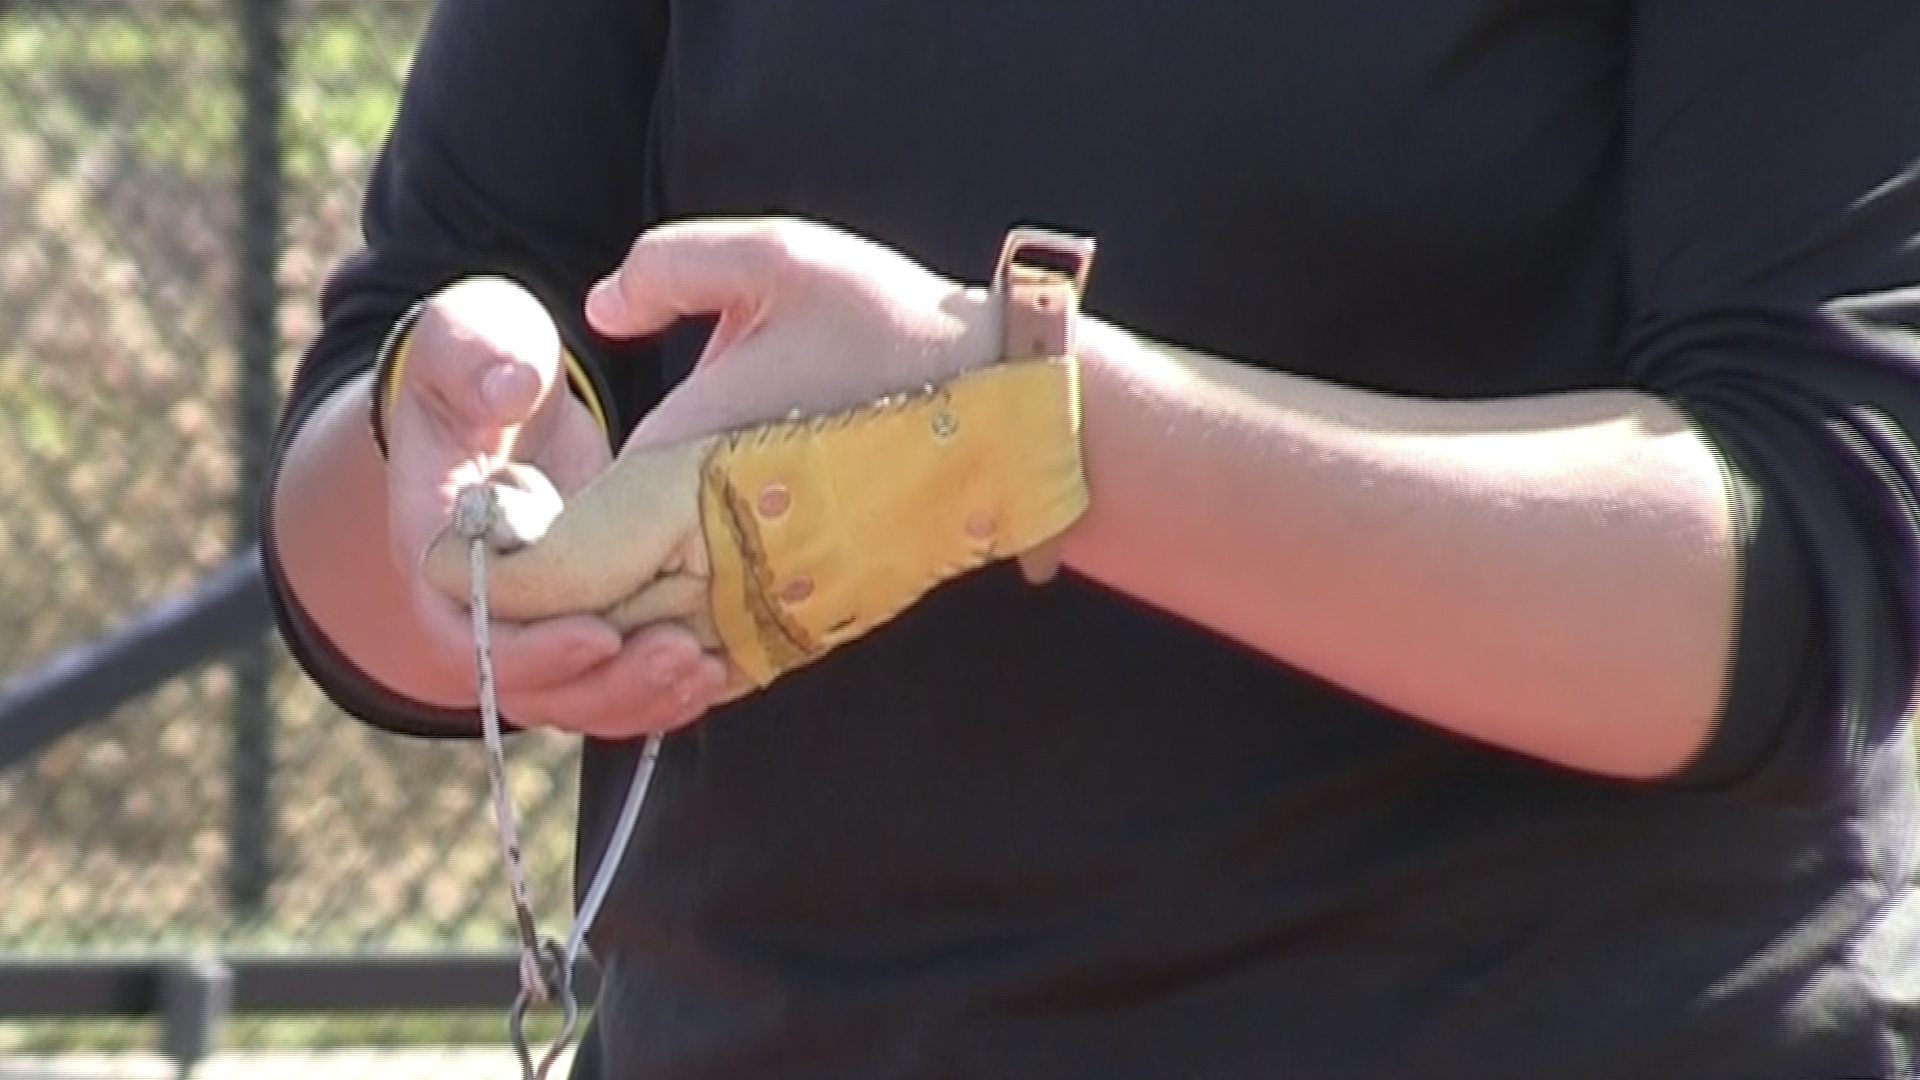
The hammer is gripped with left hand on the hammer handle with the fingers curled together at the distal interphalangeal joint; the right-hand covers the left hand.
Hammer throwers wear a glove or tape on the fingers of the left hand because of the force against the fingers during the execution of the hammer throw.
The most common position of the implement at the start of the throw is off the right side of the thrower with the hammer handle resting near the left hip The hammer should rest just inside the ring with the arms straight across the body.
To start the throw, the body weight is shifted to the left and the shoulders are turned to the right, then the hammer is lifted off the ground across to the center of the body to the far left to start the winding action. The hammer moves in a circular pattern during the winds and turns called the orbit. The orbit is repeated during the winding action and turns, the highest point of the orbit is near180 degrees and the lowest point of the orbit is near 360 degrees during the turns. The winding action accelerates the hammer and sets up the optimal orbit of the implement. Most throwers execute two winds before the right foot is picked to initiate the turns. During the winds, the body movements counterbalance the swinging hammer, keeping the body weight opposite the direction of the implement. The thrower should remain tall with just enough lower bodyweight shifts to counteract the movement of the hammer during the winds.
After the hammer is directed up and to the left, the right wrist curls down on top of the left wrist raising the right elbow upward. Then the shoulders are turned to the right as the left elbow is raised up, next the hands pass over the head near the right ear. The hands and hammer are stretched behind the right side of the thrower. The hammer will drop behind a solid flat right foot, setting up the first low point off the right side of the thrower.
The hammer is pushed from behind the thrower, off the right leg then is extended in front of the thrower with both arms out long; the orbit is directed from back to the front of the thrower (not up and down) Next the hammer is pushed to the left as it rises up as the shoulders are turned to the right. The hands move upward before reaching back behind the thrower, similar to the action of the first winding movement. The hammer is pushed from behind the thrower near 180 degrees. The hammer thrower will drop and sit with the lower body, keeping the body weight against the ball as the implement is directed forward with the low point of the implement at 360 degrees when the thrower starts the turning action. The upper body and hammer move together with the head centered as one system. The shoulders are pushed out, concaving the chest to extend the hammer further out, lengthening the effective radius of the hammer system.
The orbits during the winding action should be relatively flat especially for novice throwers.
Hammer Turns
Hammer throwers typically use 3 to 4 turns to accelerate the implement into the release. During the entry of the first turn, the hammer moves out and to the left of the thrower. After the hammer moves past 0 degrees, the thrower drives to 90 degrees by turning on the ball of the right foot and the heel of the left foot.
The left leg stays flexed as the thrower moves to the left before the right foot is picked up. When the hammer reaches 90 degrees the right foot is lifted up and turned in to step over the top of the left foot. The legs must stay close together with the knees tight during the turning action on every turn.
The left foot rolls from the heel to the middle outer edge of the foot to the front outer edge of the foot. The left leg is pivot point of the turn, keeping ground contact with the left foot will keep the thrower in a stable, balanced position during the turns.
During the heel-toe turning action, both feet are synchronized, moving together to maximize efficiency (USATF, 2015).
The right foot quickly steps to 270 degrees as the left knee drops down. Most throwers plant the right foot flat on the first turn to keep the bodyweight against the hammer on the left side. The upper body stays long, the hammer should be caught (right foot touch down) at 230 to 260 degrees on the first turn to create separation between the lower body and upper body. The hammer throw is the only event with multiple power positions, after each turn (catch), the thrower lands in a power position to apply force to the implement.
The implement is accelerated from the catch to the low point by ‘stroking’ the hammer with the right side of the body and arms (USATF, 2015). The acceleration of the hammer is aided by gravity while the ball is descending after the catch.
The hammer is driven down to 0 degrees, as the hammer drops down the thrower counteracts the forces by directing the body in the opposite direction of the ball. If the hammer is low, the thrower should be more upright; when the hammer is high, the thrower must stay down with the lower body and drop the left knee under the hammer on each catch.
With each turn, the thrower keeps both feet on the ground to approximately 90 degrees. Next, the right leg is driven up and planted near 270 degrees, usually on the ball of the right foot during the later turns. After each turn, the hammer is caught further back during the catch. The first turn is caught between 230 to 260 degrees, by the final turn the hammer is caught near 220 degrees. The further the hammer is caught back, the greater the force that can be applied to the ball.
Delivery
After the final catch, the thrower drives the hammer down into the low point then turns the right side into a firm left side creating a blocking action. The thrower extends up and onto the left leg while finishing up with the arms to release the hammer.
After the hammer is released, the thrower needs to regain balance by dropping the center of gravity and moving away from the front of the circle.

Novice hammer throwers learn to turn on the heel of the left foot using a three turn technique.
Most advanced hammer throwers use a four turn technique. Some advanced throwers perform a toe turn on the first turn to save space in the ring; while a few advanced throwers with smaller feet can execute four heel turns.


